Can you picture a world where in-chair whitening can be done without the need for any gum barriers and no sensitivity?
Traditional in-chair whitening techniques typically involve the use of high-strength hydrogen peroxide gels applied to the teeth with the aid of gingival barriers to limit gingival irritation from the whitening gel. This method is widely used, and can be often used with or without an associated blue-light device, with the intention to enhance and speed up the whitening process. With this popular method, clinicians like myself commonly encounter patients who exhibit mild to extreme sensitivity post-operatively, as well as gingival irritation and burns from the whitening gel running off the tooth hard surfaces and contacting the adjacent soft tissues. This is also why I commonly get told by patients that they do not enjoy having their teeth whitened in-chair, which may lead them to decide not to go ahead with in-chair whitening treatment. What if we could still use a high-strength hydrogen peroxide, but deliver this in a way that is precise, doesn’t run, hence limits gingival and soft tissue irritation, tooth sensitivity, and therefore does not require the use of any barriers?
Most current in-chair teeth whitening systems centre around 1. A high strength hydrogen peroxide aqueous gel 2. A light-cured resin barrier to temporarily cover and protect the gingival tissues from the peroxide gel and 3. A blue light system marketed to help accelerate the chemical process and achieve a greater result in a shorter amount of time. The issue with this overall technique mainly stems from the high concentration of peroxide required to achieve the result in a short period of time, and the risk that contact with soft tissues can result in temporary soft tissue burns, and tooth sensitivity. These common side-effects in my experience are the main reasons patients either choose not to do in-chair whitening, or are apprehensive about doing so.
What if we could use the proven power of high-strength hydrogen peroxide, apply it in a precise manner so it doesn’t run, and therefore not require a gingival barrier to protect the adjacent gingiva and root surfaces?
I recently tried out a whitening technology from Colgate, the Optic White Light Up In-Chair Whitening System, which is specially designed for just that! The system is designed to limit tooth sensitivity, as well as applied without a gingival barrier. I was so excited and keen to give it a go!
The whitening technology comes in 2 main parts: the whitening pen (Figure 1)
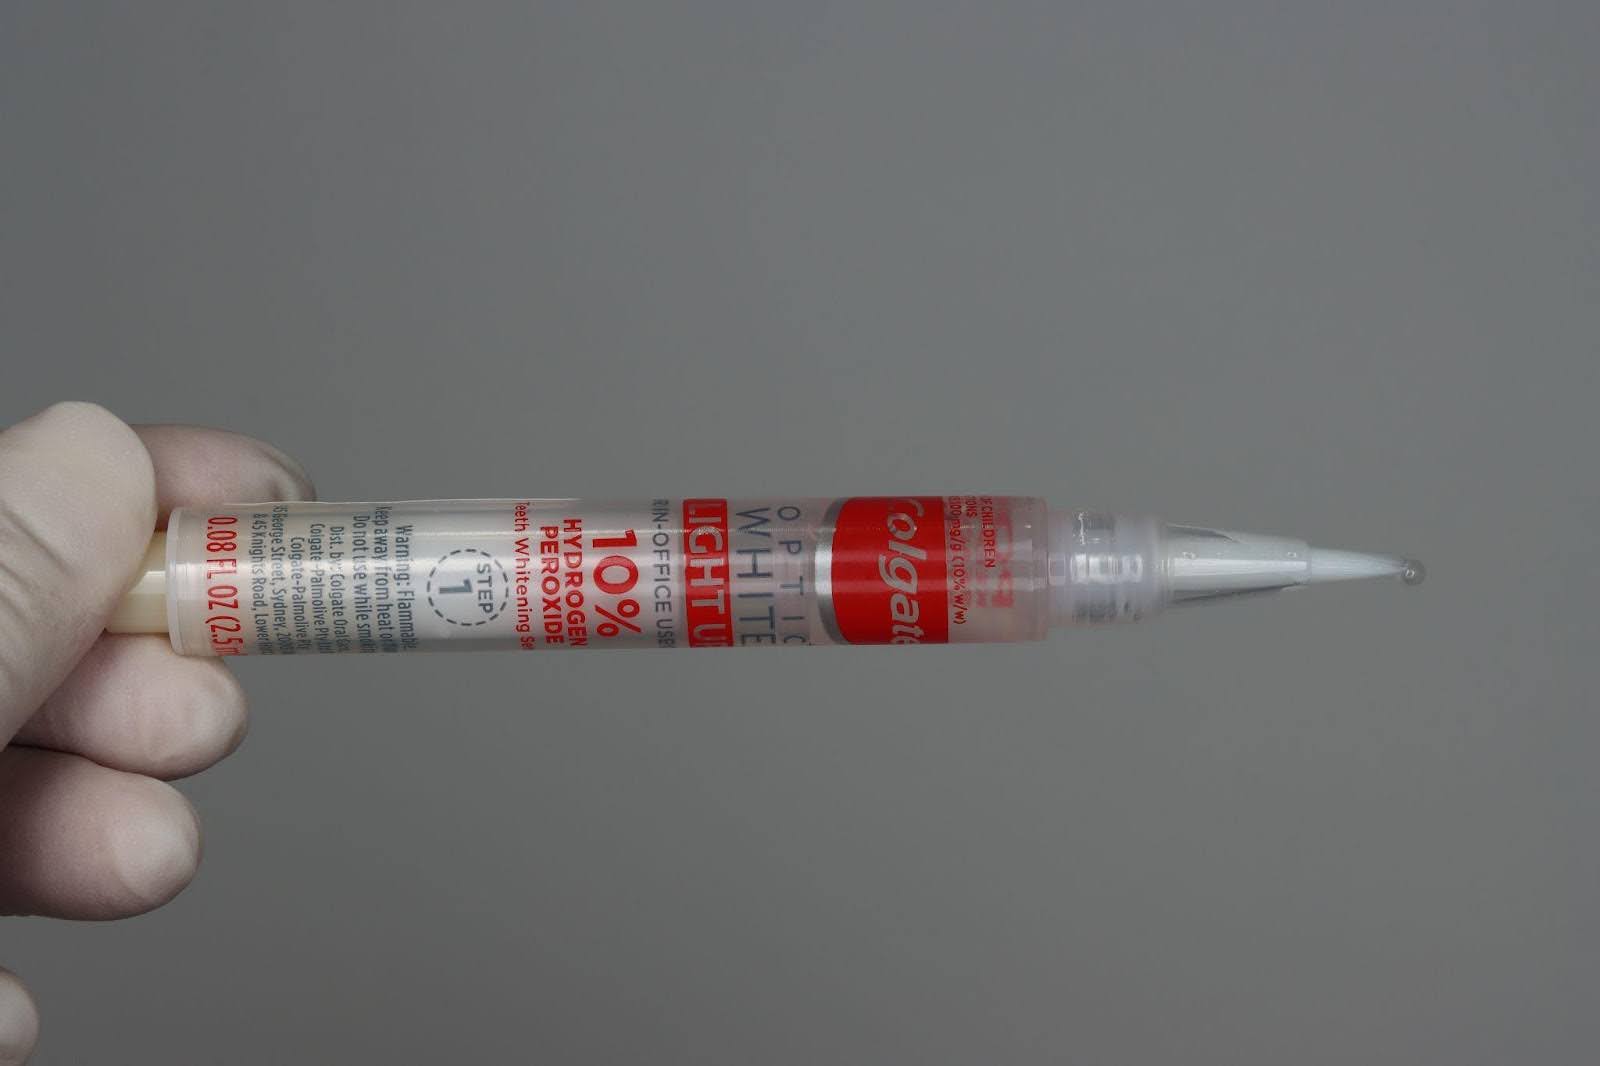
Figure 1: 10% Hydrogen Peroxide pen, which contains 10% hydrogen peroxide in an ethanol carrier, as well as an indigo light (Figure 2).
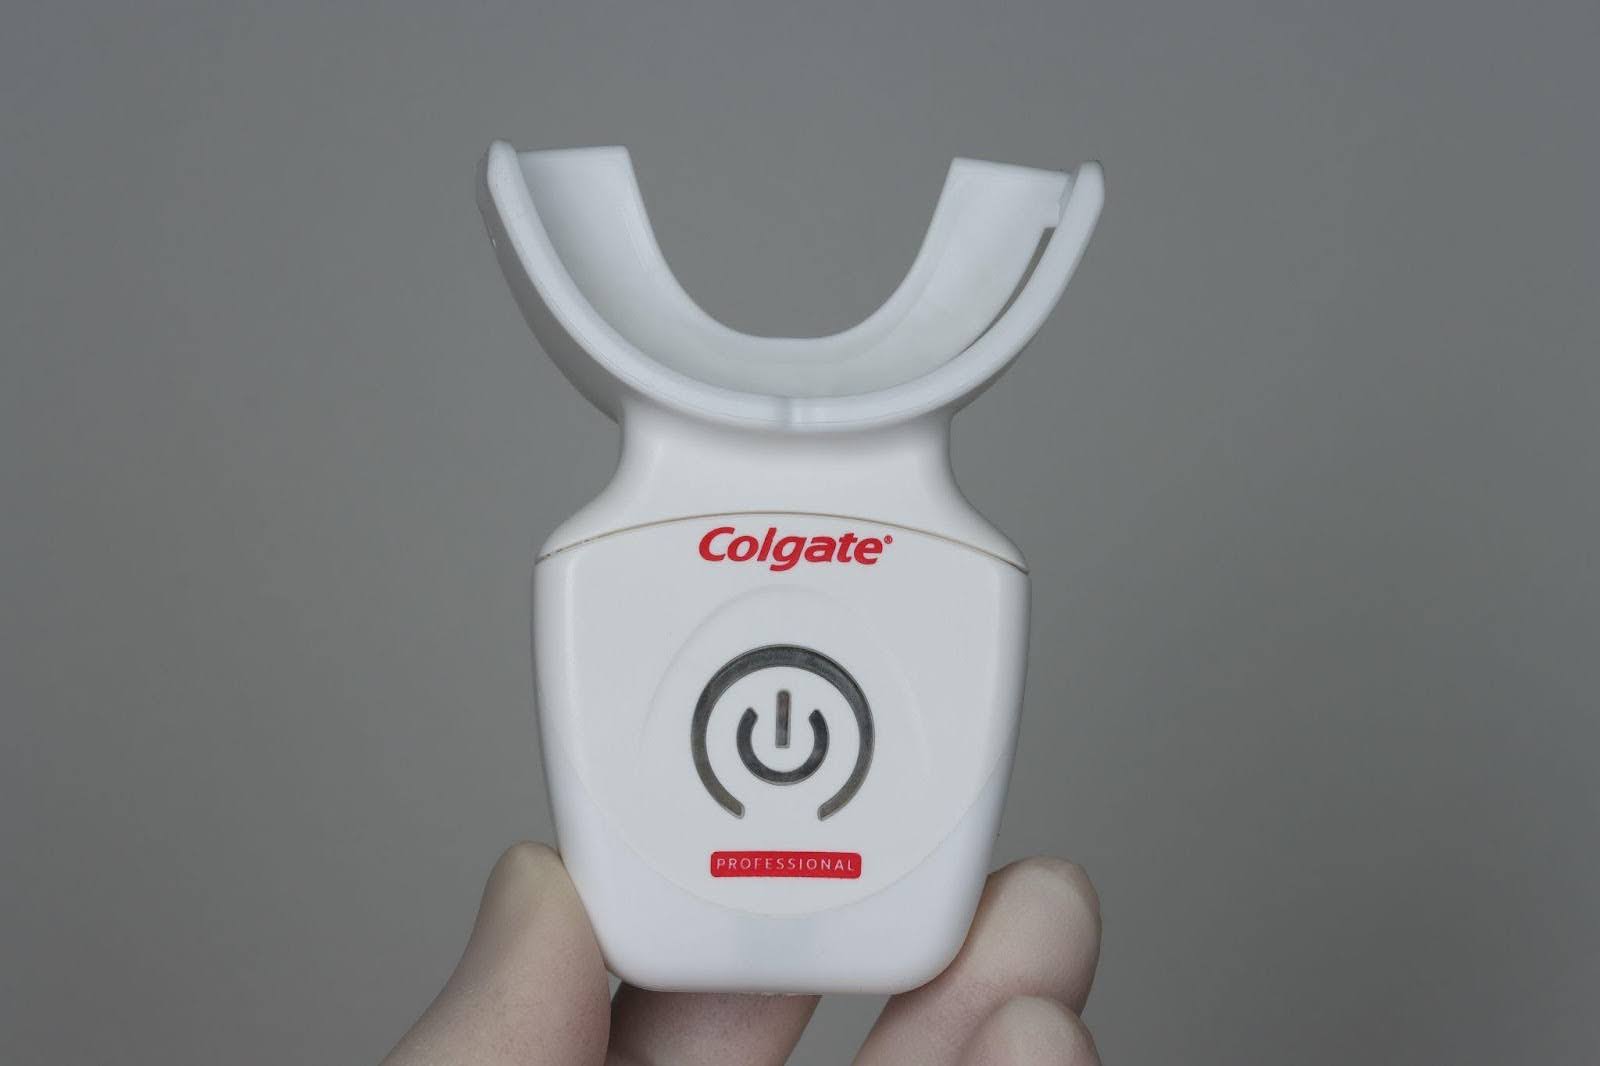
Figure 2: Colgate Optic White Light Up light device
What’s special about both of these components is that Colgate has completely re-thought the chemistry of how to apply the whitening gel to the tooth surface, as well as the light device itself. The main difference with the whitening gel is that it is not aqueous-based, and once applied to the tooth surface, the ethanol carrier dries up, leaving a firm film layer over the tooth, maintaining contact of the hydrogen peroxide with the tooth surface, which cannot be easily dissolved or removed by saliva or water. The specially-designed pen also allows precise application of the gel onto the tooth surface, resulting in no need for any gingival barriers (Figure 3).
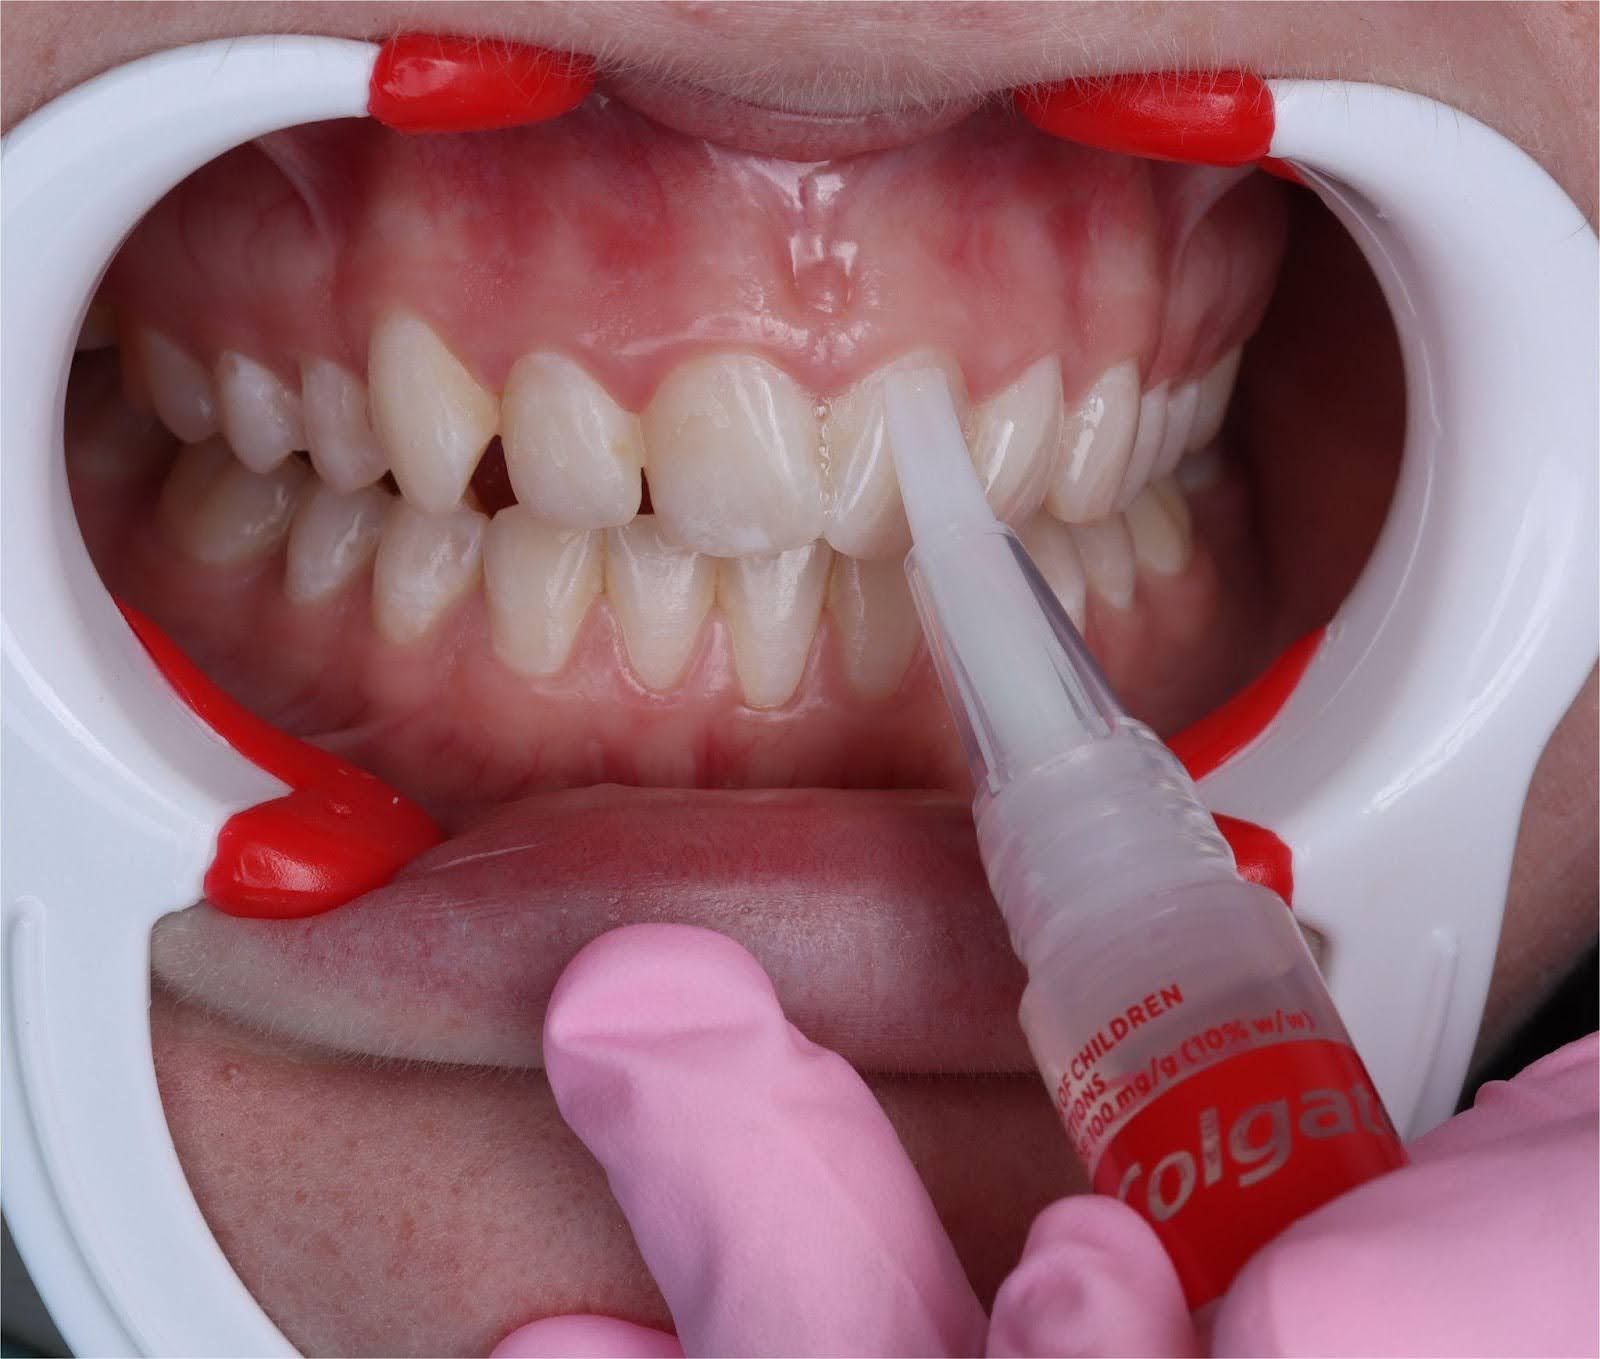
Figure 3: The whitening gel applied directly to the tooth surfaces without the need for gingival barriers
As the ethanol solvent evaporates, not only does it leave a film just where you place it, but it results in a concentrated layer of hydrogen peroxide - how cool!
What was surprising the first time using the pen, was just how easy it was to apply to the teeth, with little mess. I had complete control of the whitening serum and where it was placed. This saved me a lot of time chair side as I therefore didn’t need to protect soft tissues prior to the whitening treatment, as well as removal of these same barriers once the whitening process was complete.
The whitening was done for the recommended 3 rounds, each going for 10 minutes at a time, measured by the programmed LED light device, which emits a consistent indigo light of 410nm (Figure 4),
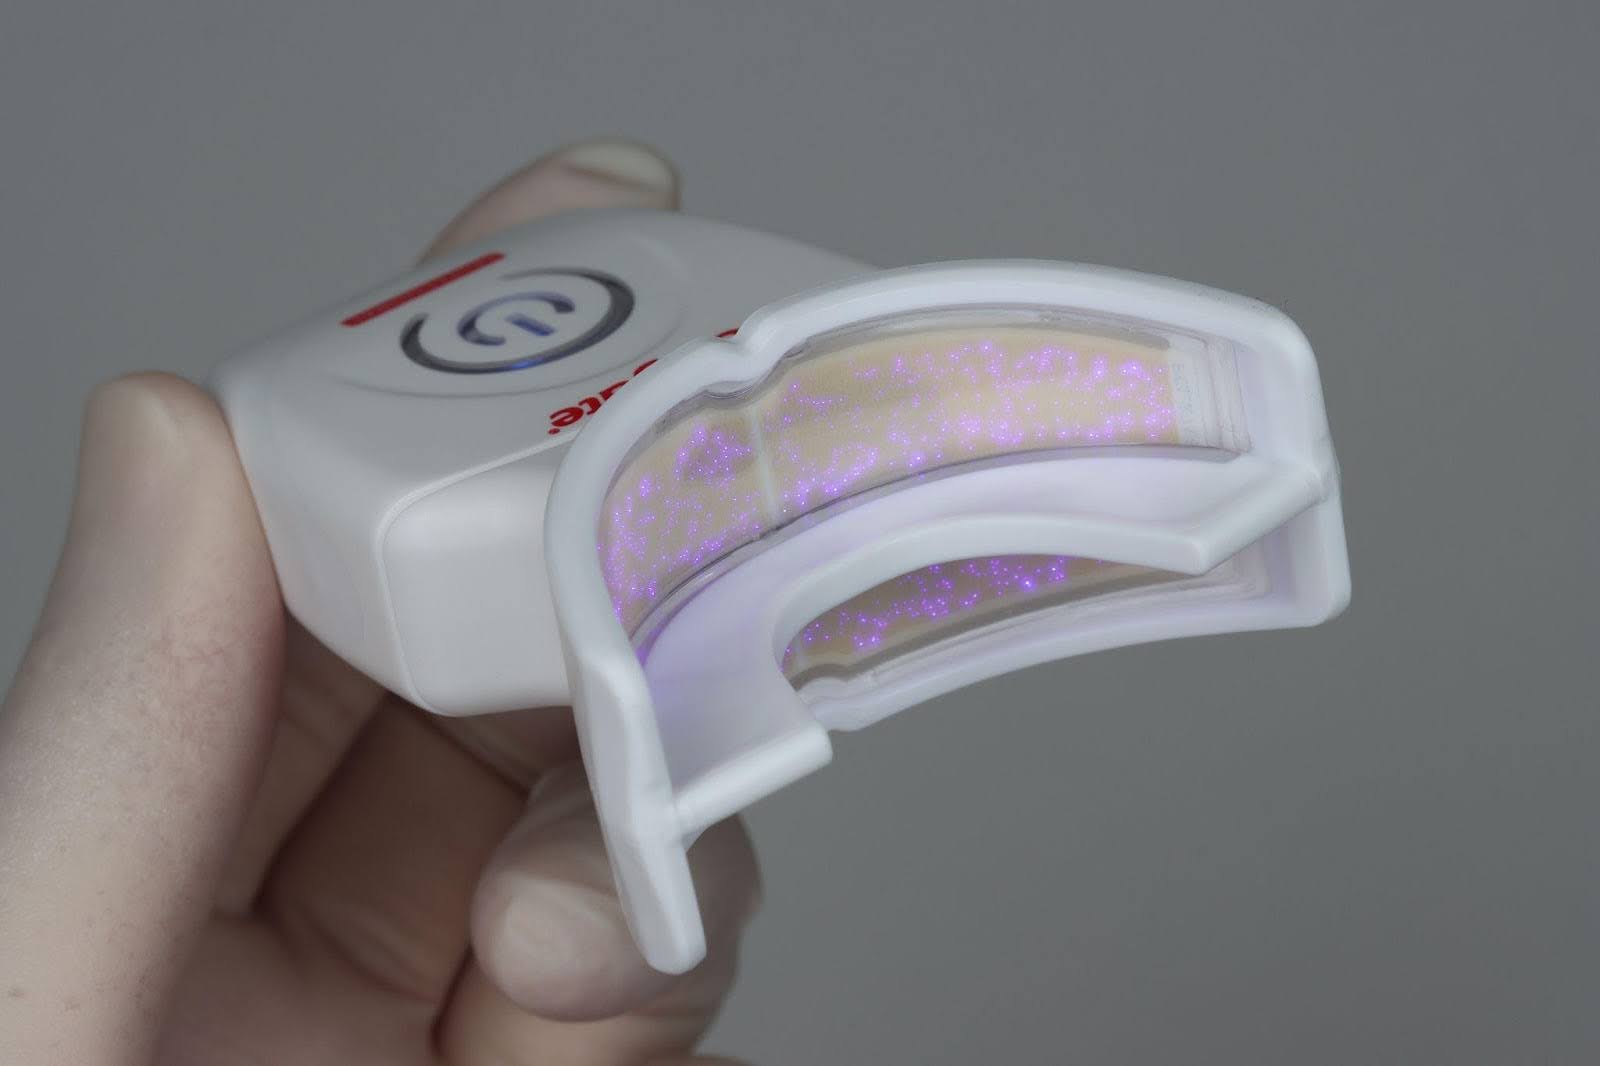
Figure 4: Over 700 LED printed indigo lights evenly distributed. For even whitening, the top and bottom teeth get equal exposure.
a much shorter wavelength than lights in the light blue region, thus delivering higher energy to the hydrogen peroxide to break down tooth stains. What I really liked about the device is it was portable and cord-free, and therefore no large or clunky light stands or cables - another really convenient design element to this system.
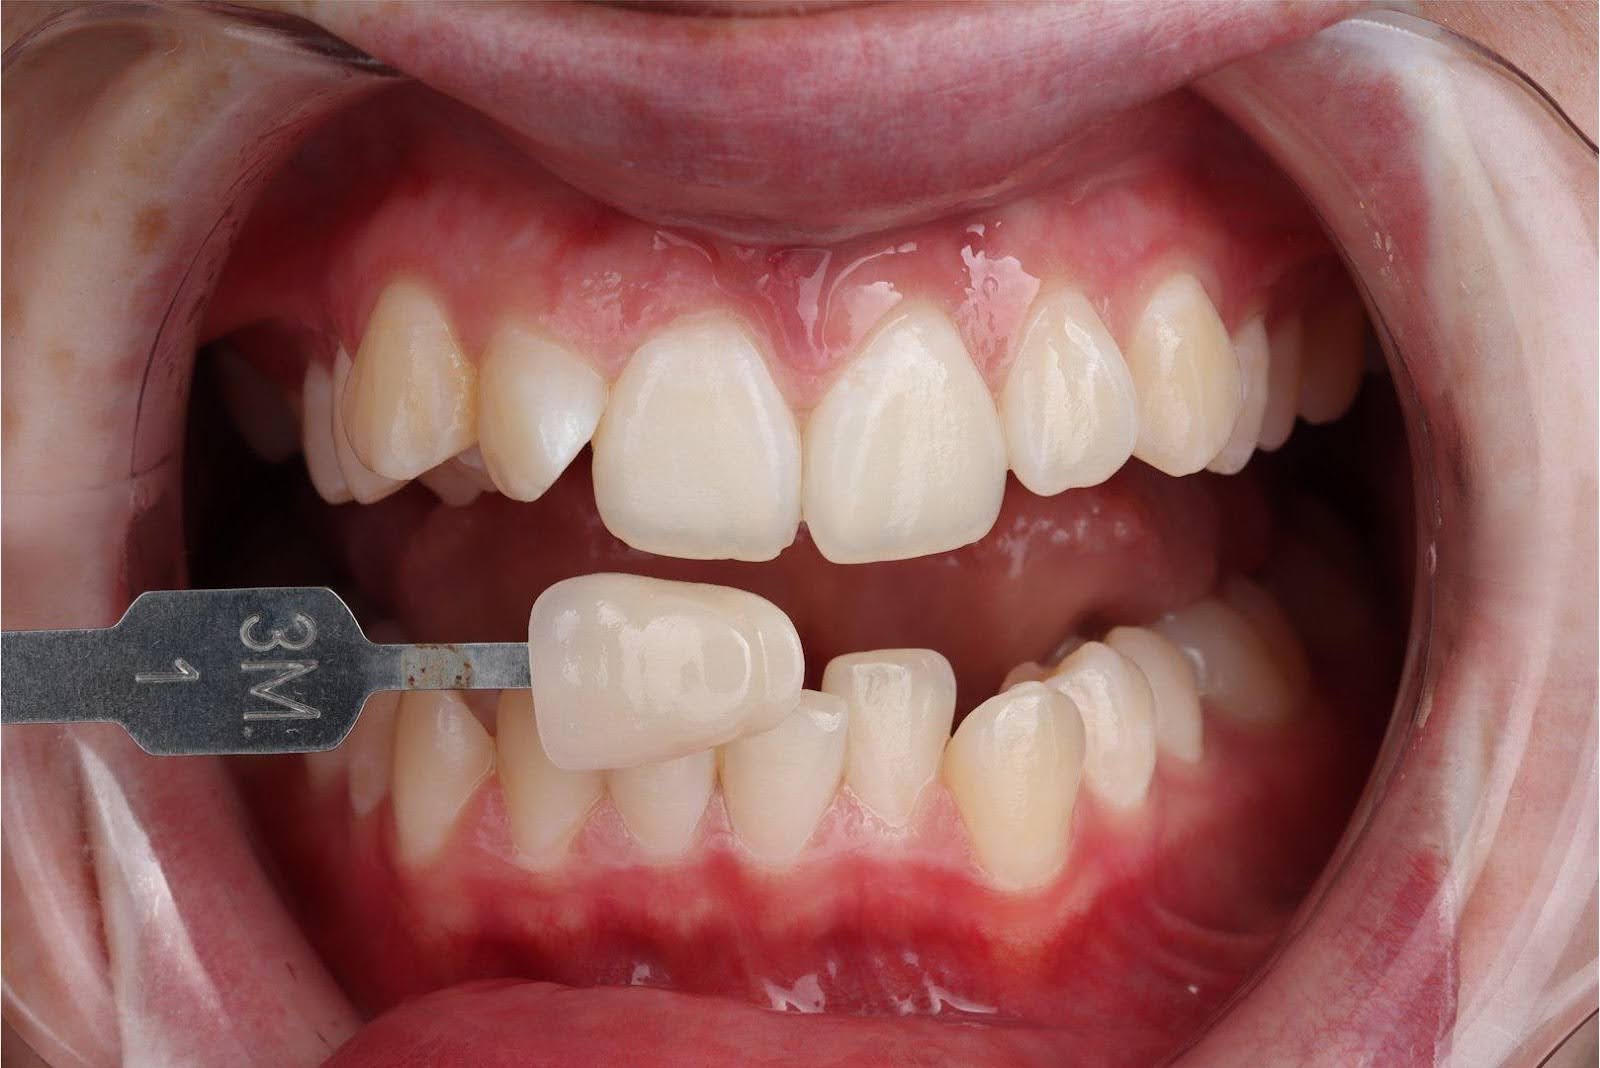
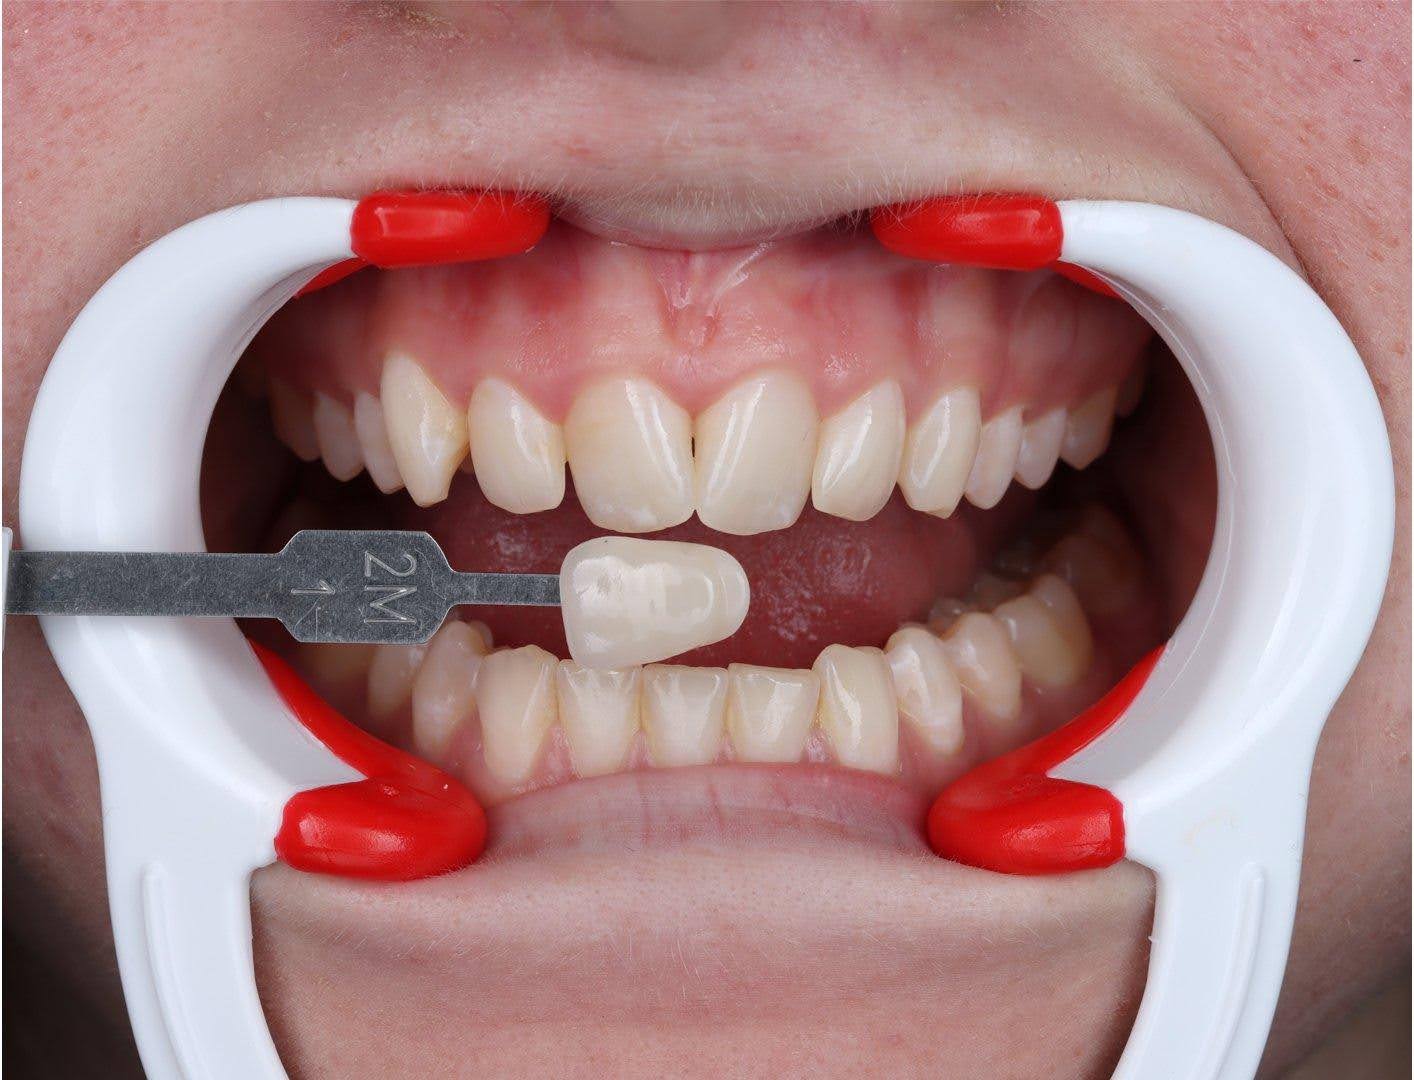
With each of the 2 patients I tried this system on, what surprised me was not only the results, but how quick the overall process was, and how little mess was made. As seen in the immediate after photos (Figures 5+6), also note how little (if any) gingival irritation or whitening occurred, and how the tooth colour change also does not appear “frosty” or “dehydrated”. Patient 1 reported very minimal sensitivity between 21 and 22, otherwise no sensitivity at all during and after the process. Patient 2 reported no sensitivity during or after the process.
Overall, I have to say I’m rather impressed with this whitening system. It’s a completely different approach to the traditional hydrogen peroxide based whitening solutions currently on the market, and has given me great results in a quick 30 minute treatment time, with no need for any gingival barriers, messy gels or bulky light devices. A great solution for all dentists and patients wanting their teeth whitened but may be time-poor, worried about tooth sensitivity or dentists wanting a whitening solution that does not require any bulky equipment or materials
1.
2.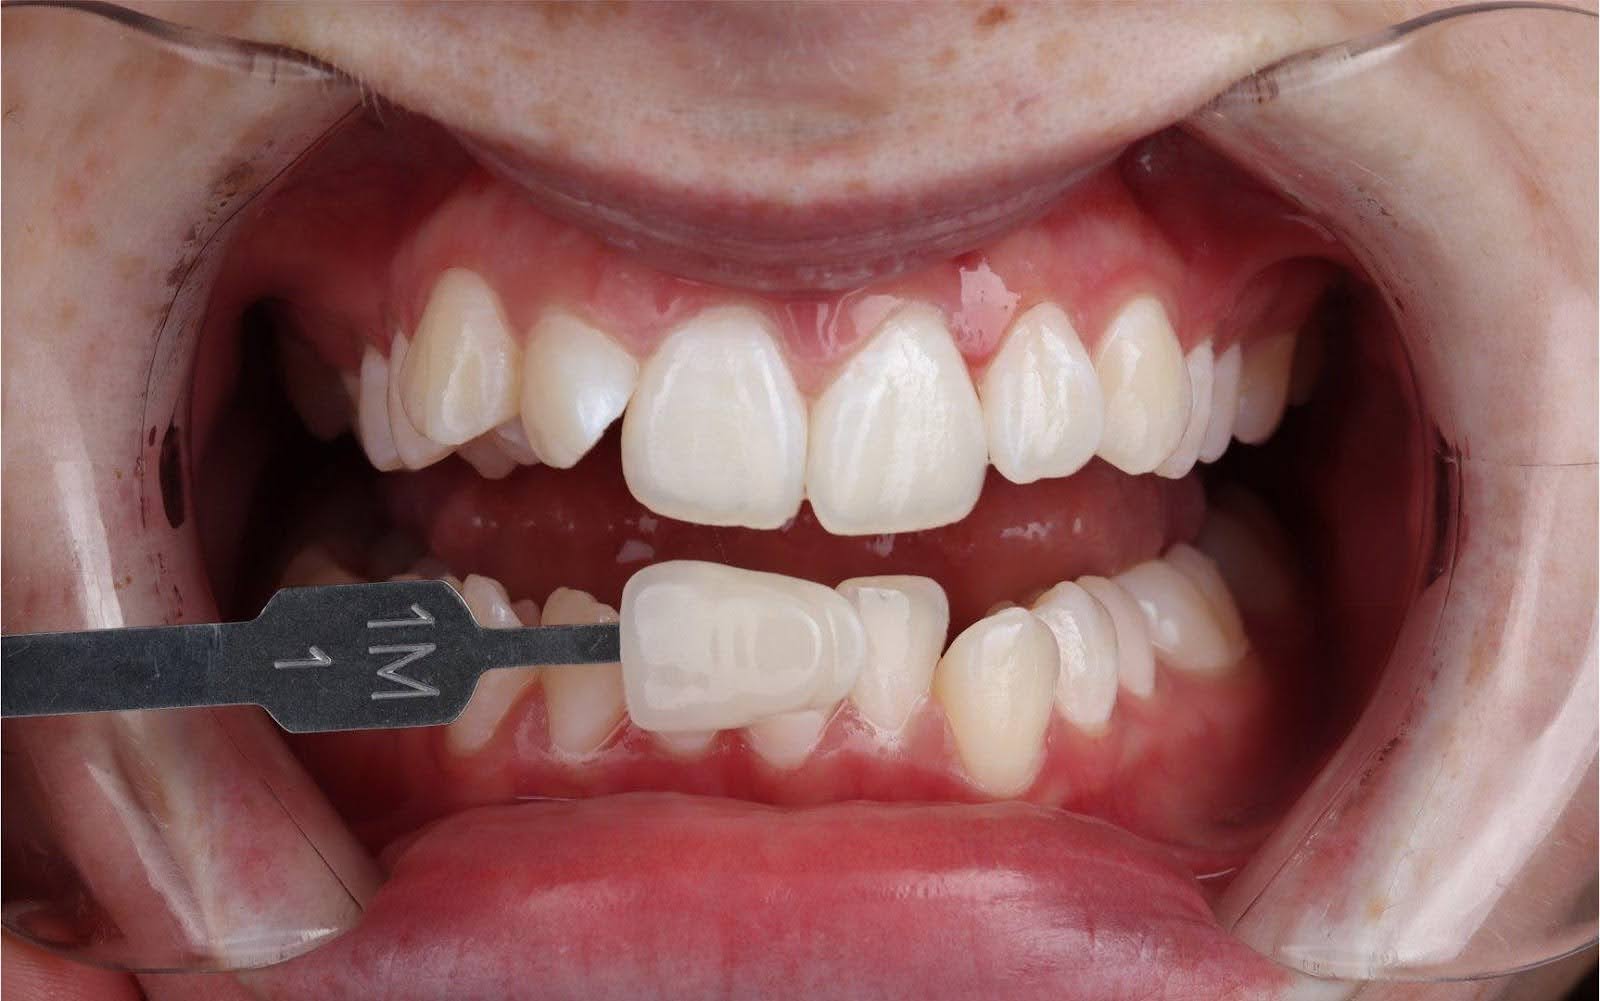
Figure 5: Patient 1
Start shade: 3M1 Vita 3D Master
End shade: 1M1 Vita 3D Master
1.
2.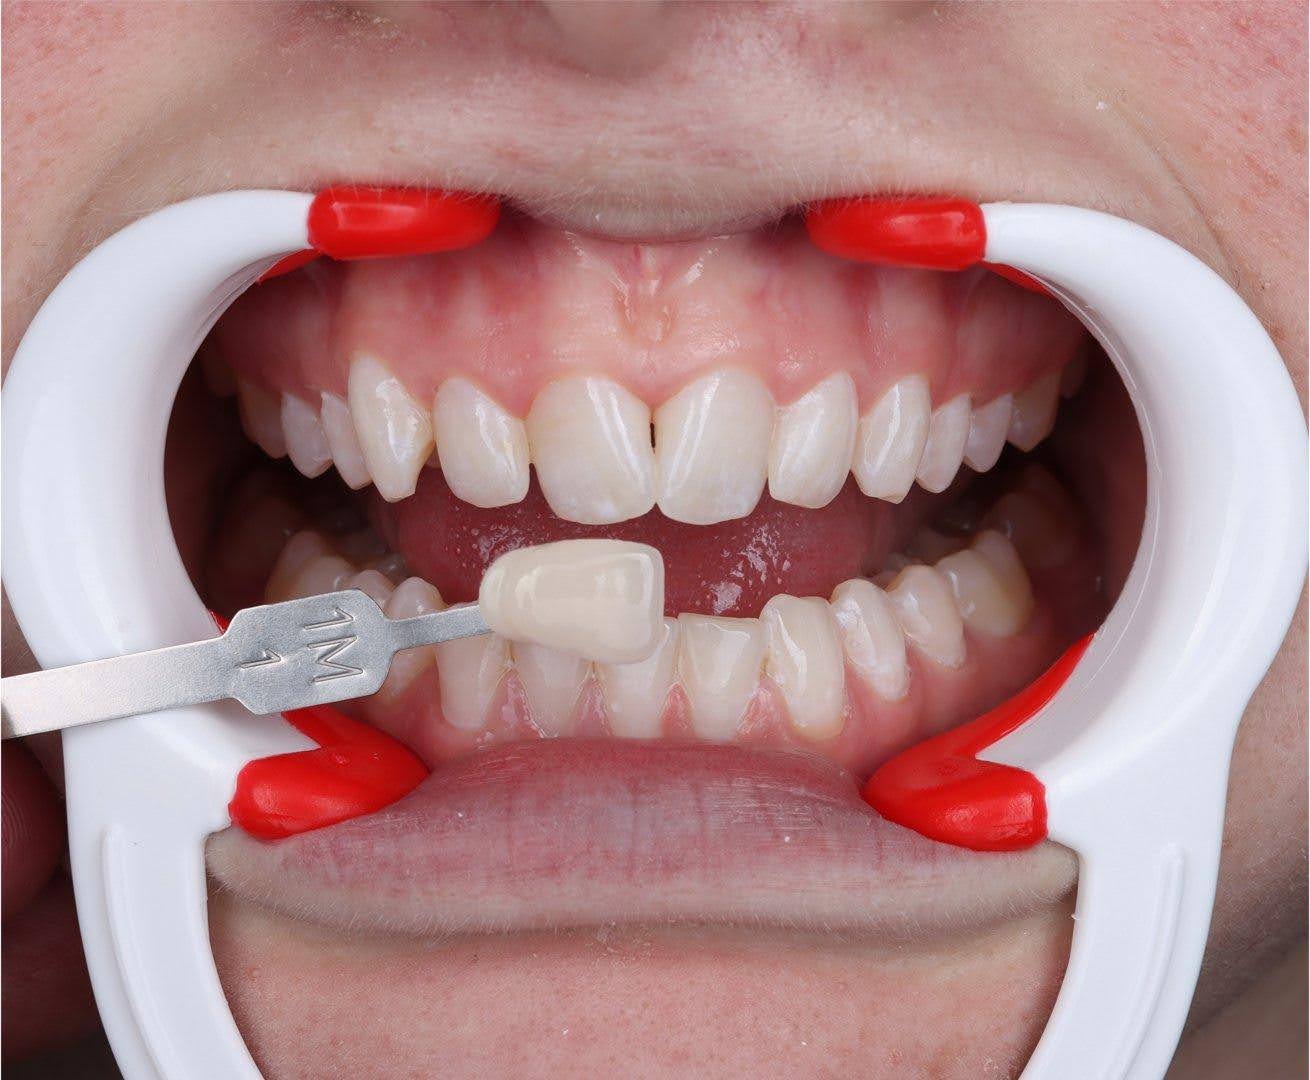
Figure 5: Patient 2
Start shade: 2M1 Vita 3D Master
End shade: 1M1 Vita 3D Master
Join us
Get resources, products and helpful information to give your patients a healthier future.
Join us
Get resources, products and helpful information to give your patients a healthier future.


